

Filemaker 2023 is here, and now supports OAuth 2.0 as the authentication mechanism for the Send Mail script step. Here's how to get things setup to leverage this.
Prerequisites:
• Filemaker 2023
• A Google Admin Console login for your Google Workspace Account
• Rudimentary understanding of JSON.
Step 1 - Create Google Project
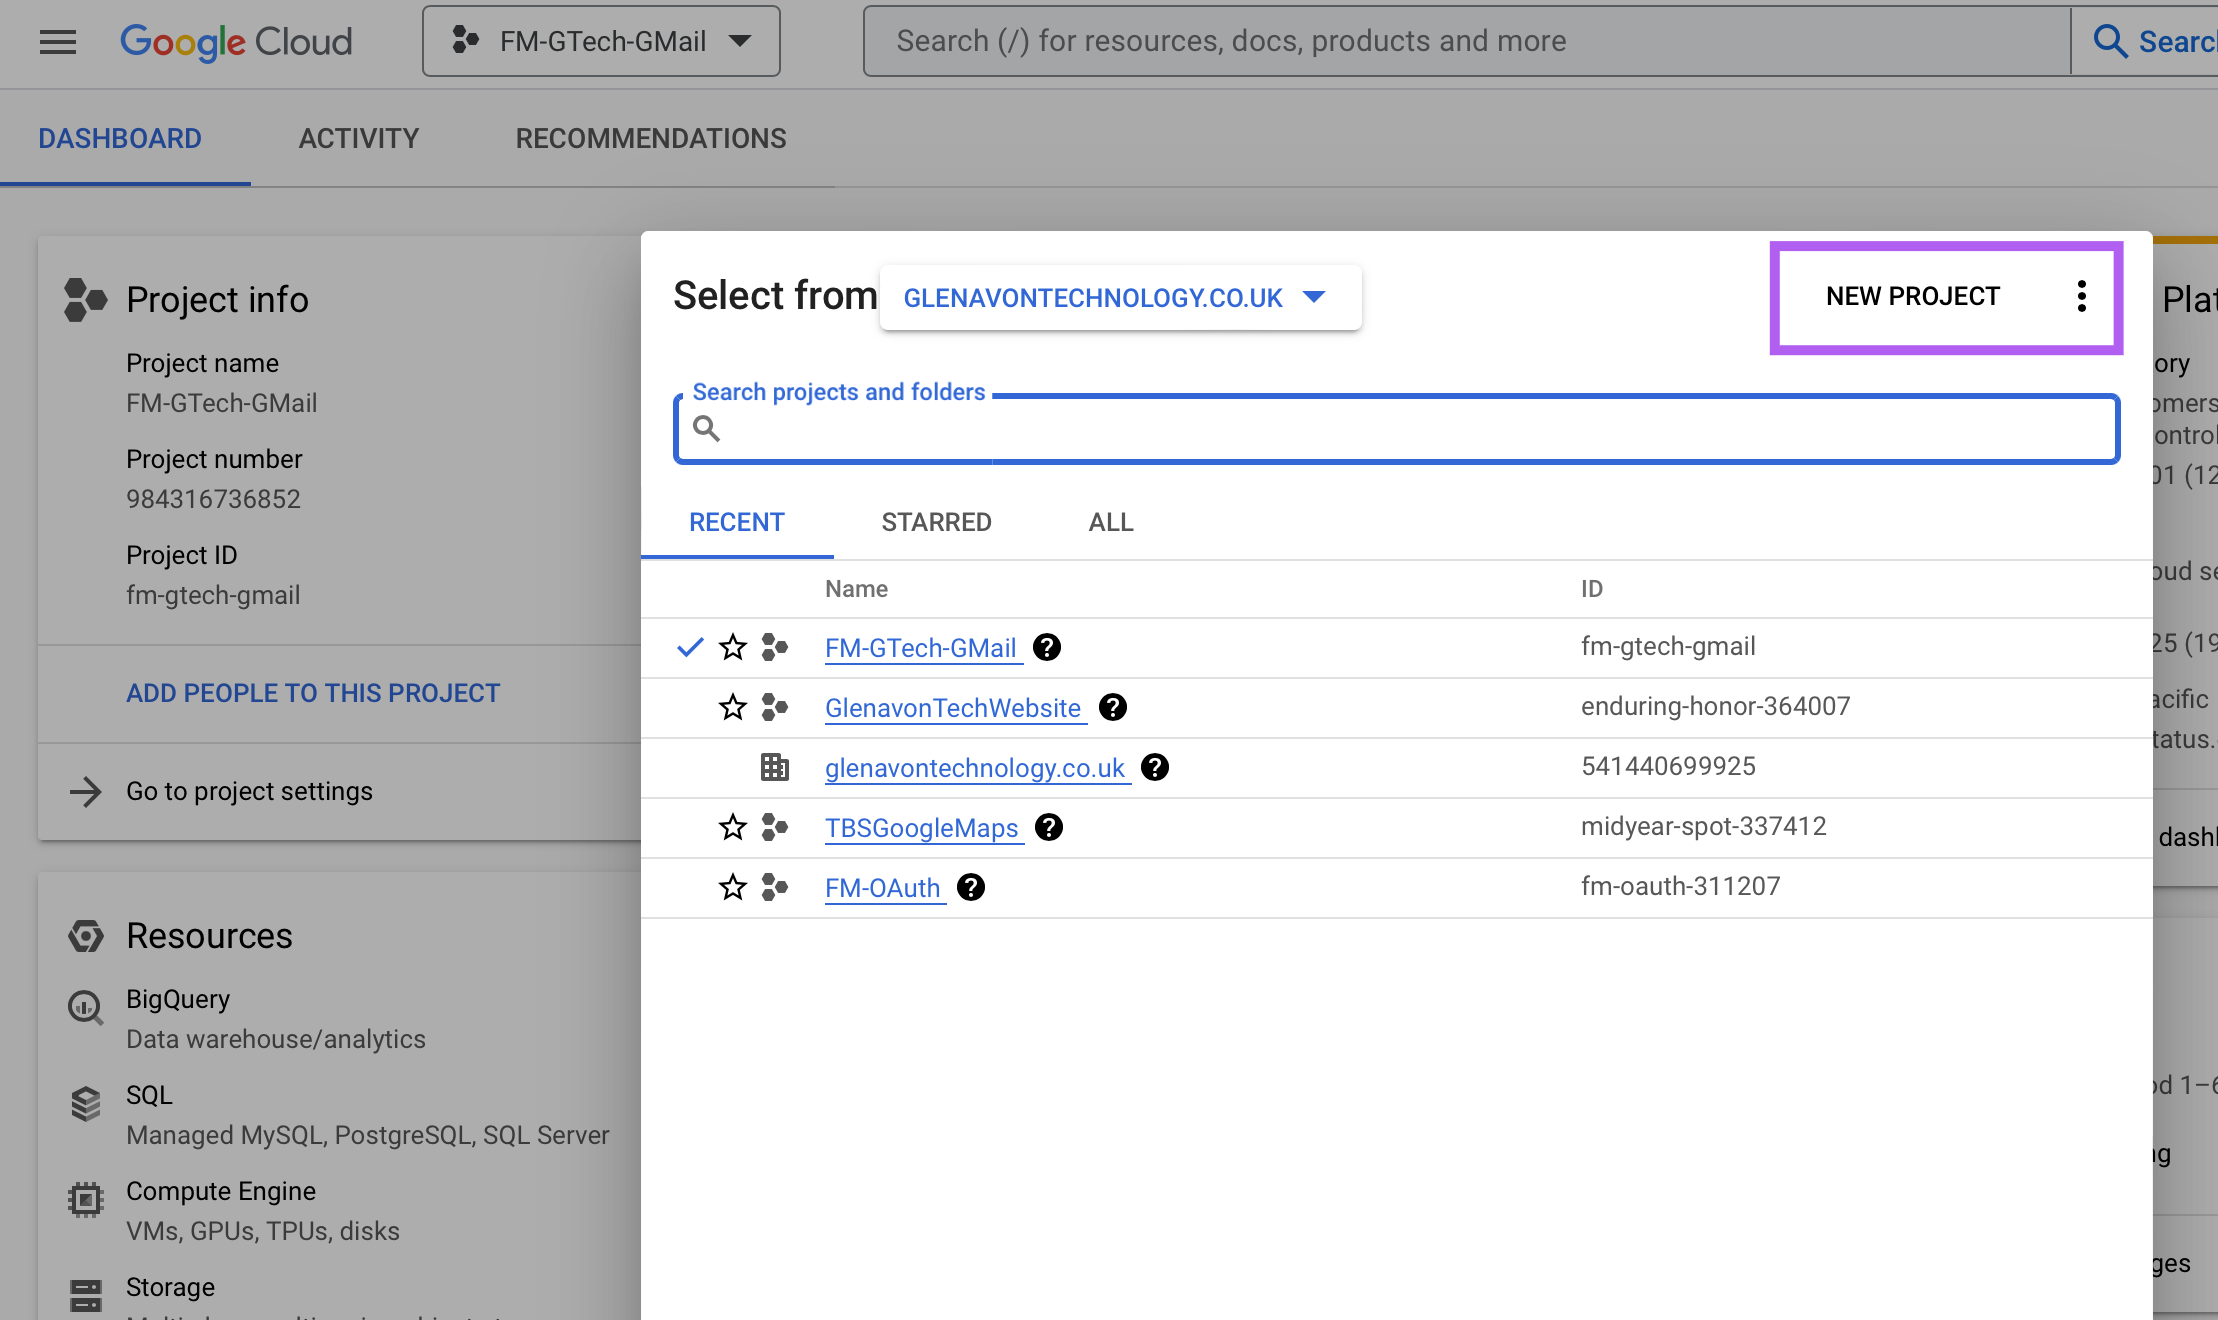
Log into your Google Cloud Console and click the Project Selector at the top of the screen, and then choose 'New Project'
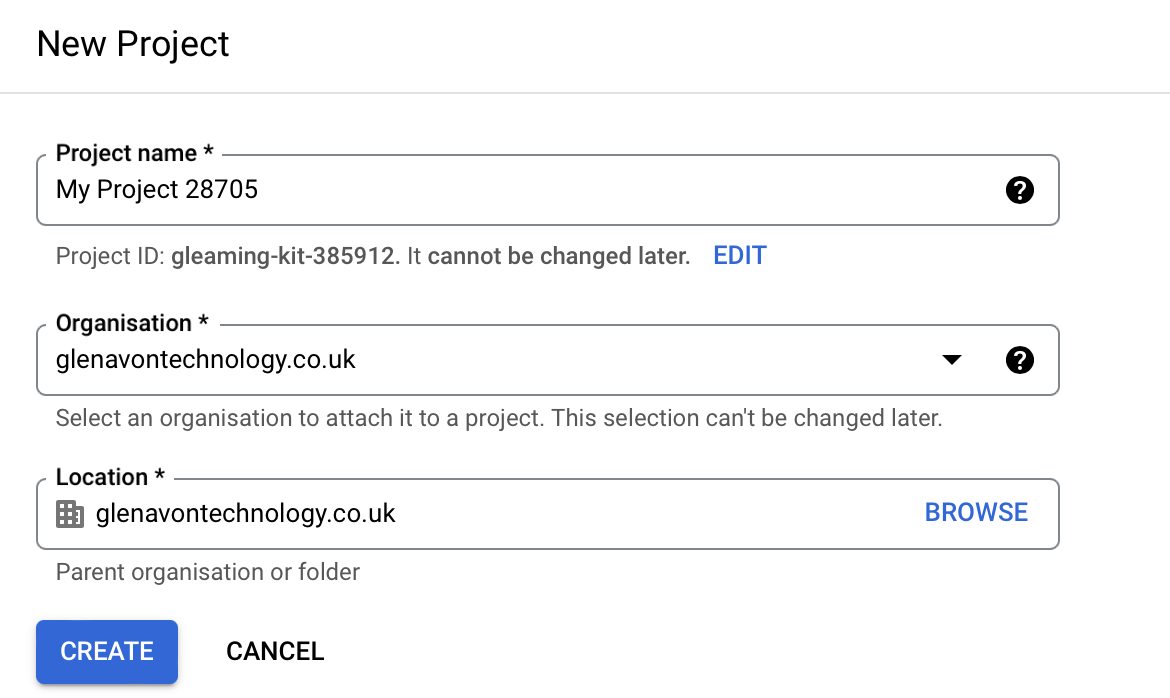
You can either use the suggested values, or give your Project a more meaningful name:
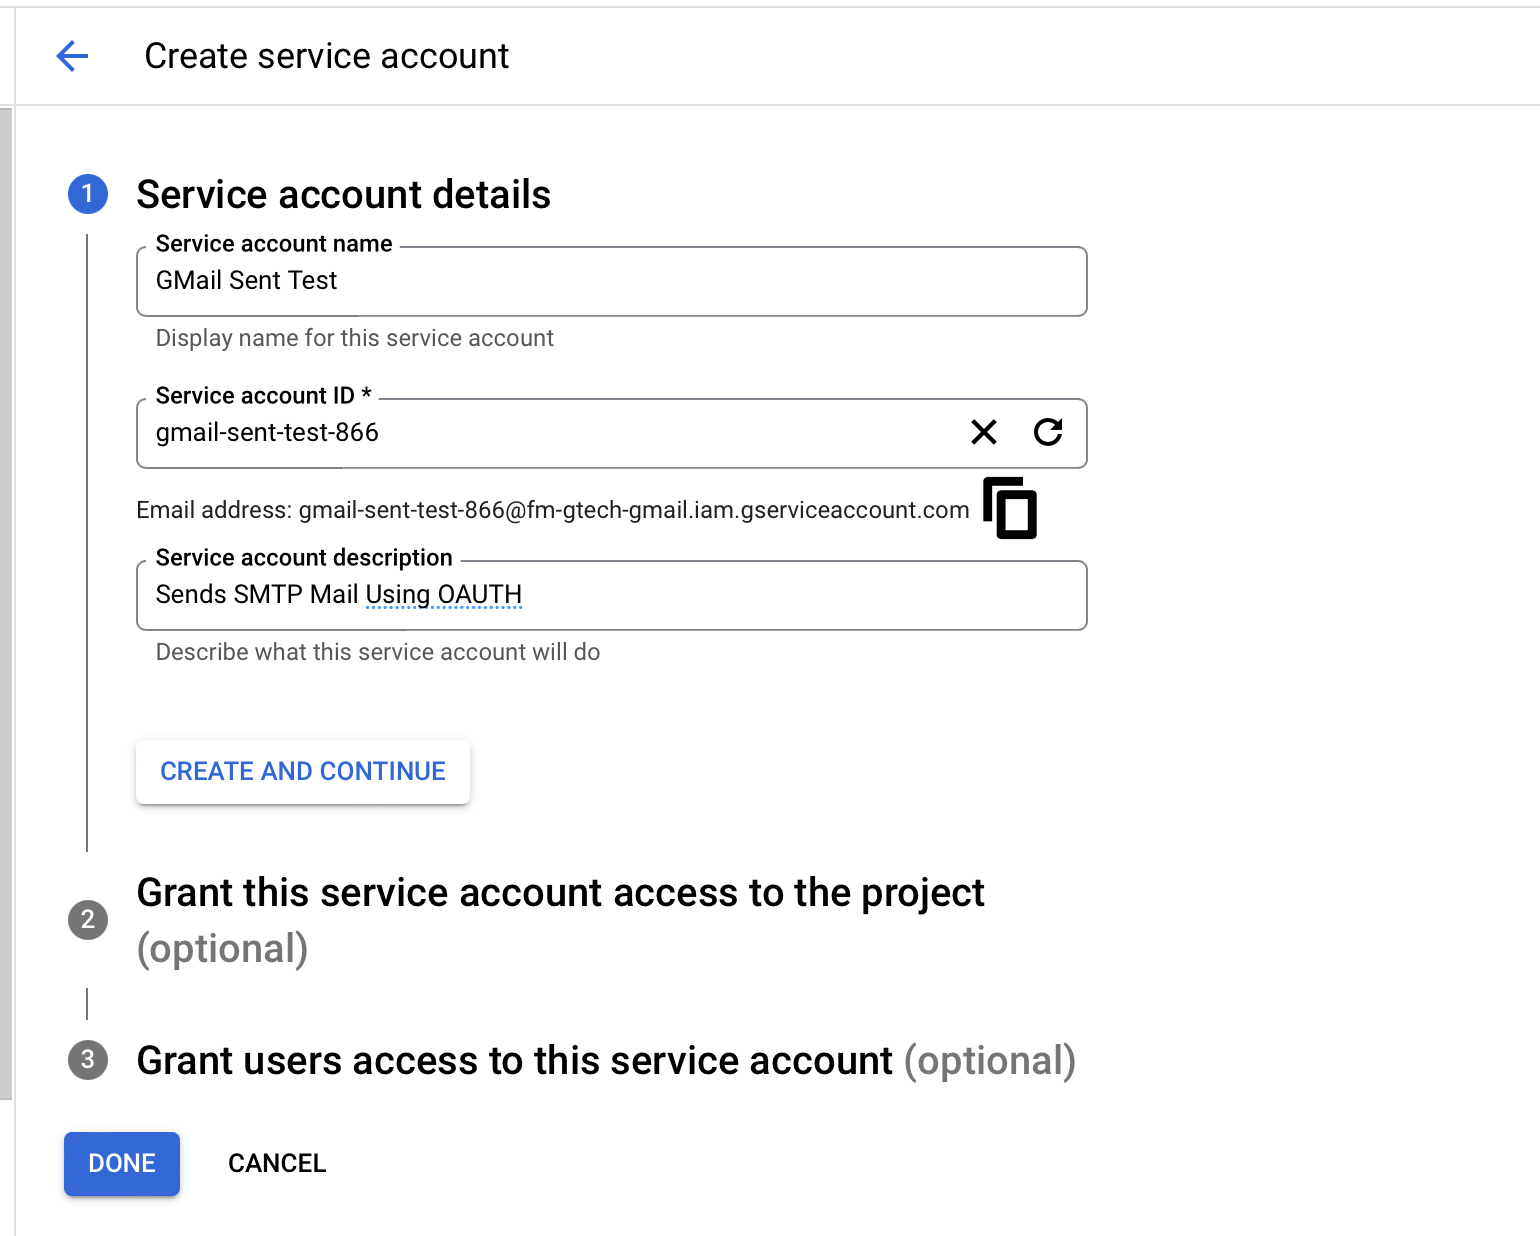
Step 2 - Create Service Account within your Project:
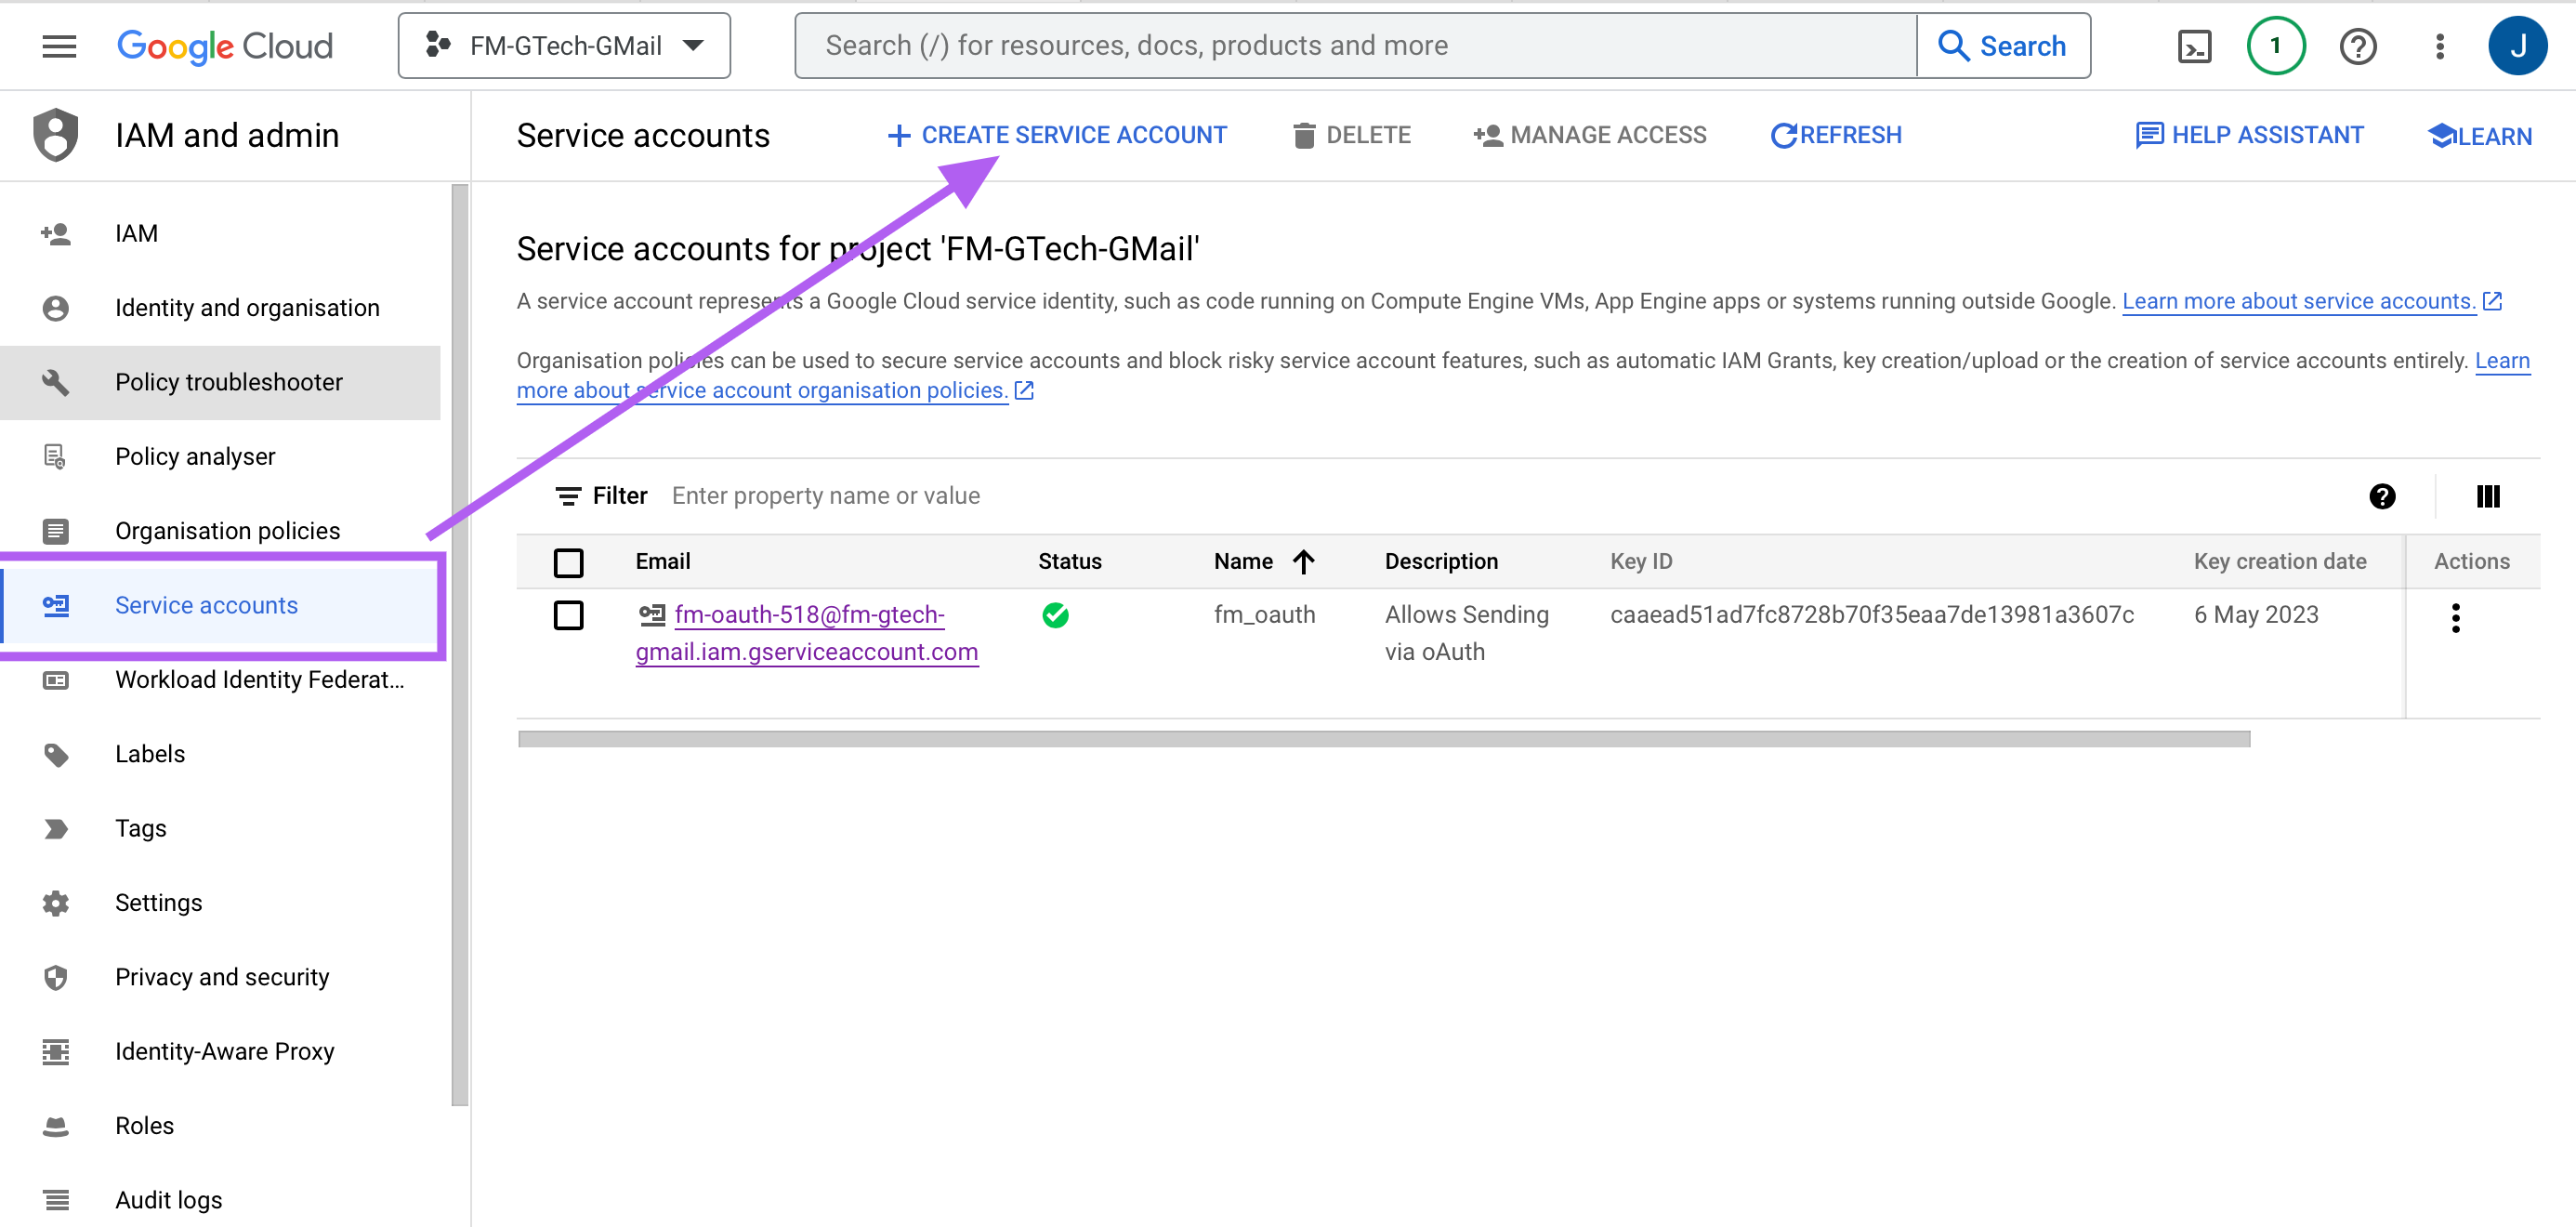
Click Create, and then skip through steps 2 and 3 (you don't need to set anything), and click DONE.
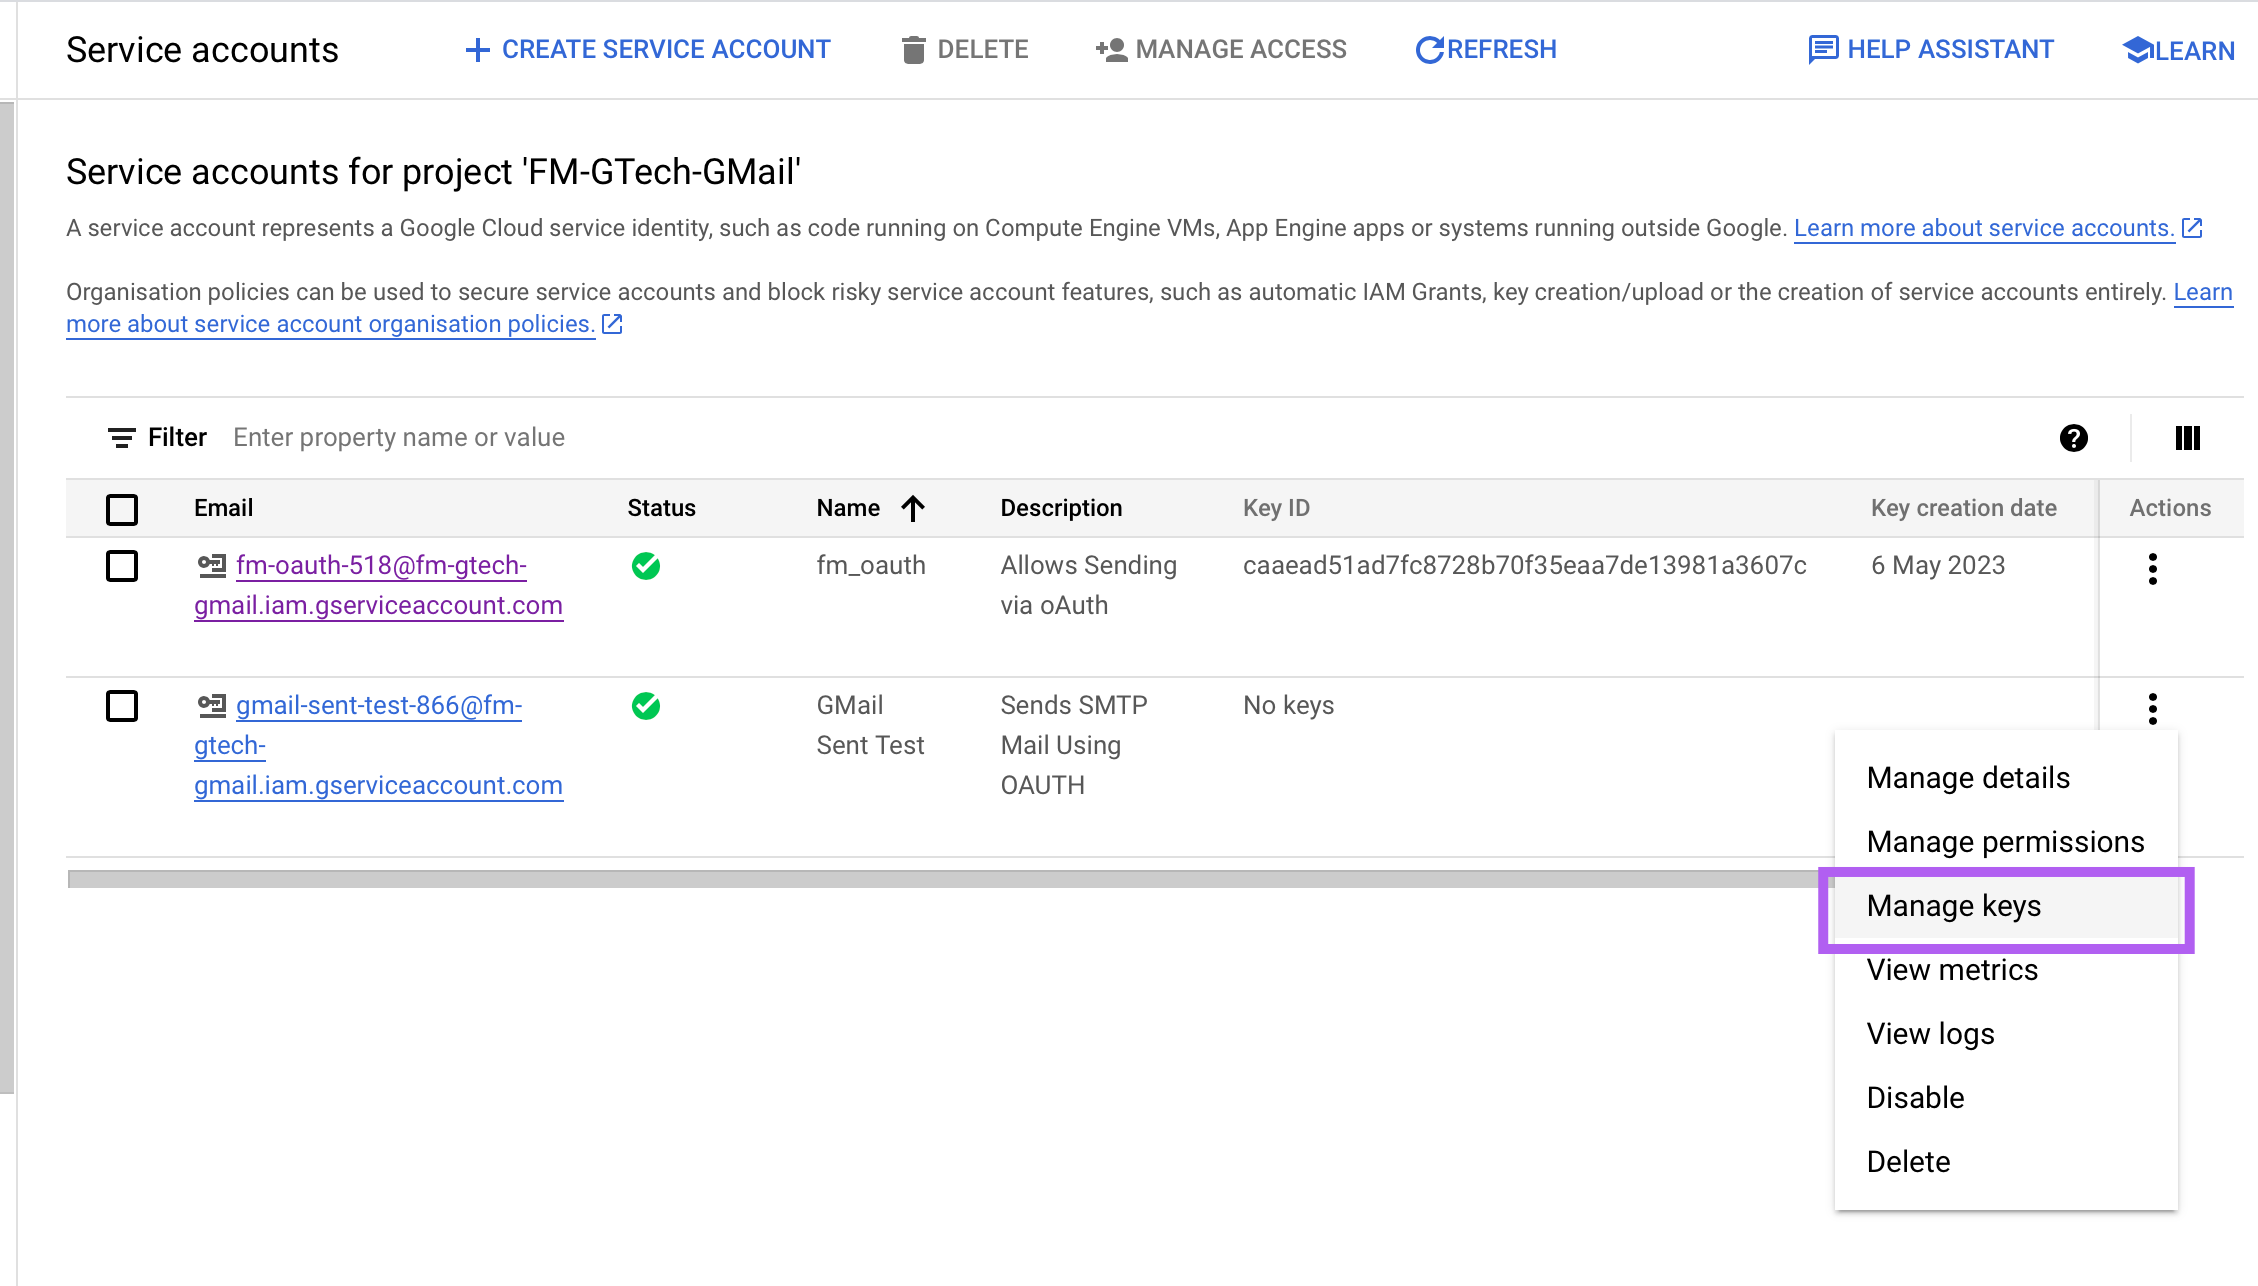
Step 3 - Generate Key
Select the 3 dots to right hand side of your new service account, and the choose 'Manage Keys':
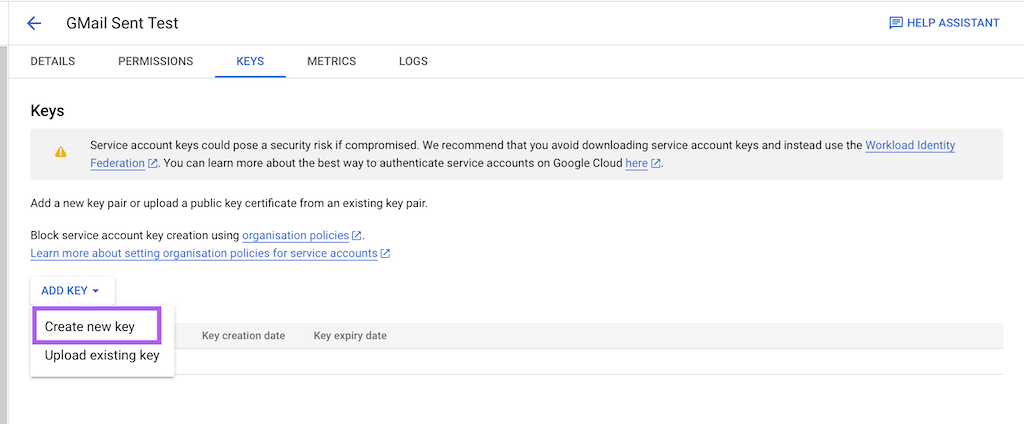
Choose Add Key > Create New Key
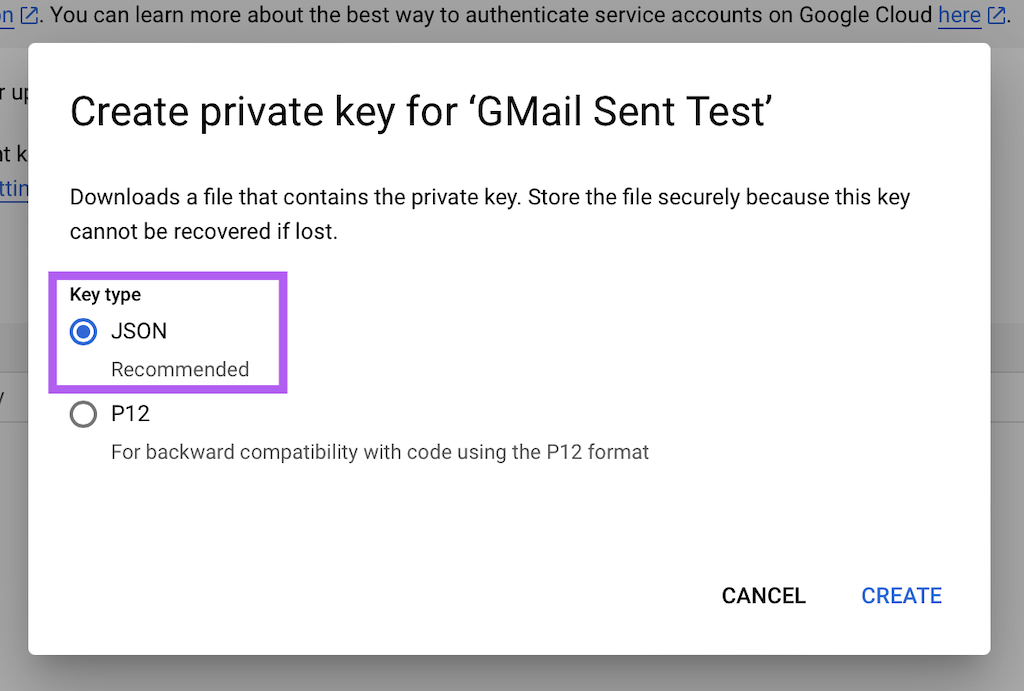
Choose JSON as the key type:
Your browser will download the JSON to your default download location, and from that JSON, you'll need the 'client_id' and 'private_key' strings:
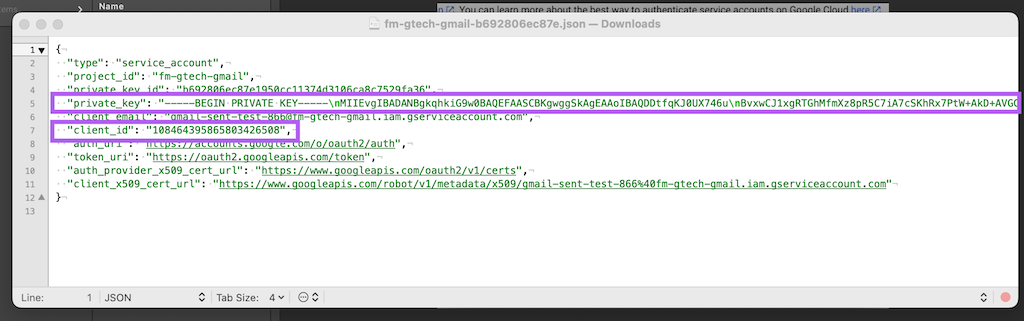
Note that the private_key element will likely have \n line breaks if you simply view in a text editor, so it's important to use something like JSONGetElement to extract the key in a suitable format (e.g with line breaks intact)
That's it for setting up the Project, and Service Account, now we just need to grant the service account permission to use Gmail:
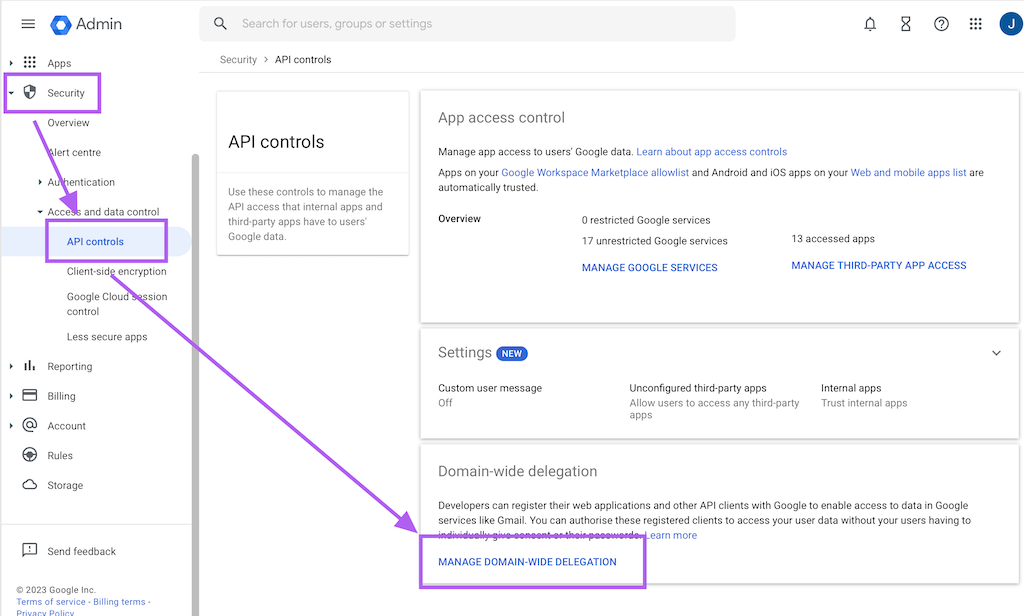
Step 4 - Implement Domain-Wide Delegation
In the Google Admin Console (note this is different to he Google Cloud Console), select Security > Access and data control > API Controls > Domain-wide Delegation:
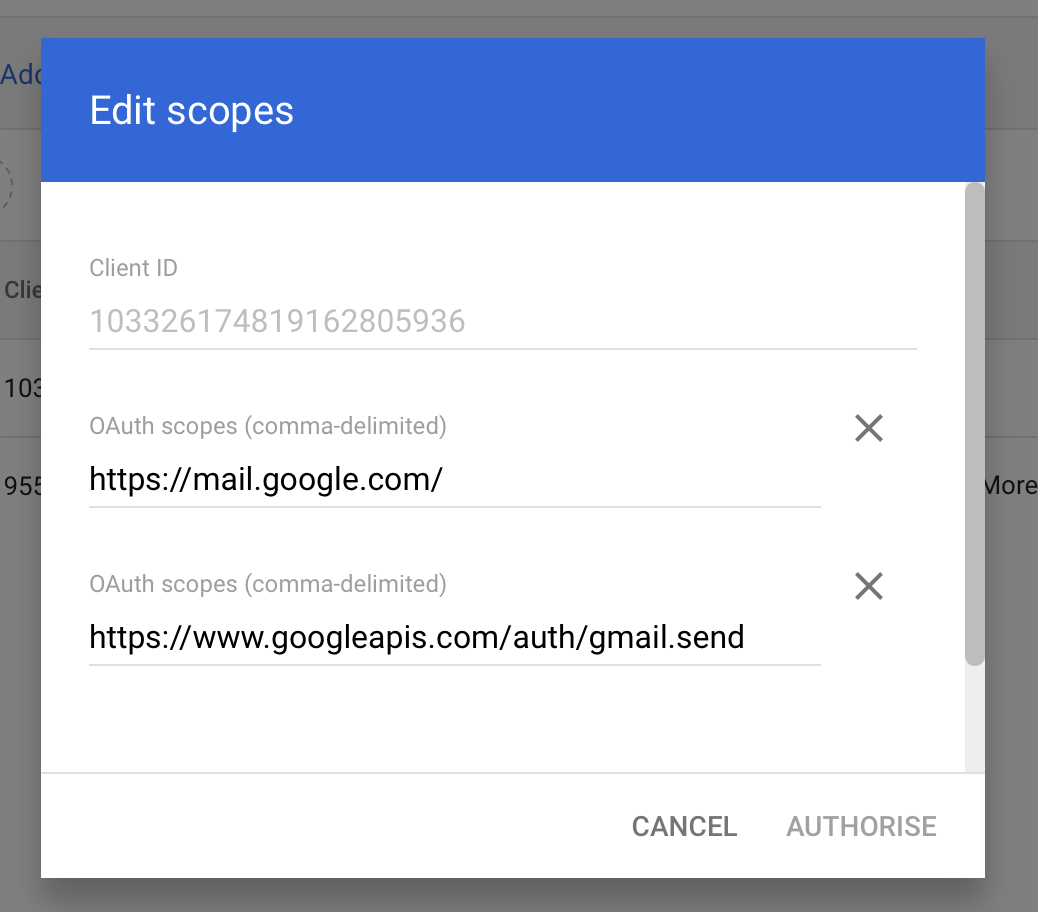
Click Add New, andhten enter in the Client ID from the JSON payload above, and then add this to the scopes:
https://mail.google.com,https://www.googleapis.com/auth/gmail.send
That's pretty much it for setting up the Google side of things - you may find you need to wait a few minutes for the Domain Wide Delegation to kick in though.
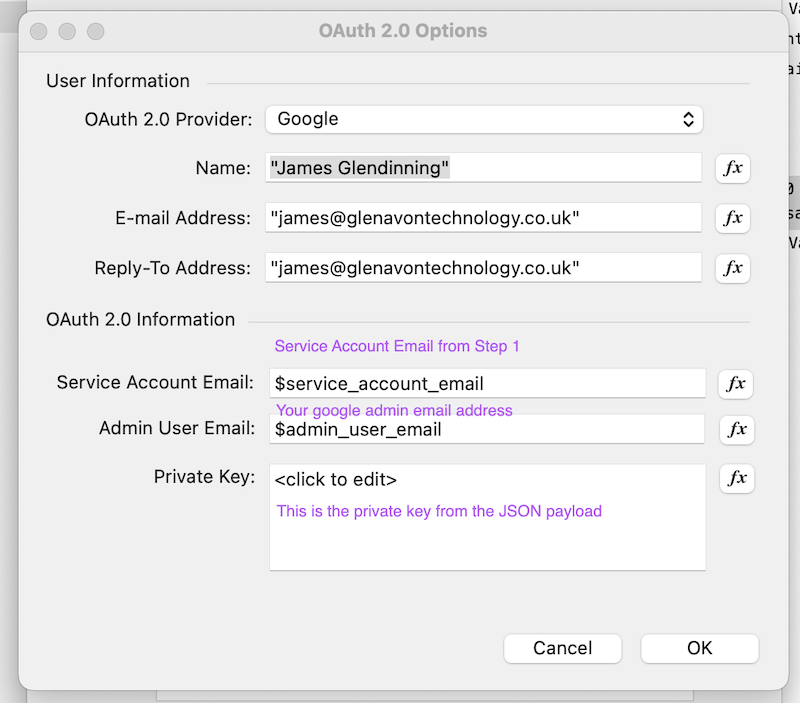
Step 5 - Configure Send Email script step in Filemaker
Now all you need to do is populate the new options in the Send Mail (oAuth) config screen:
oAuth 2.0 Provider isGoogle
'Name, E-Mail Address' and Reply-To Address are the bits for the email your sending, the oAuth 2.0 Information should be populated as below:
And that's it!
If you have any queries, or would rather have Glenavon Technology handle your Email integrations, please drop us a line


